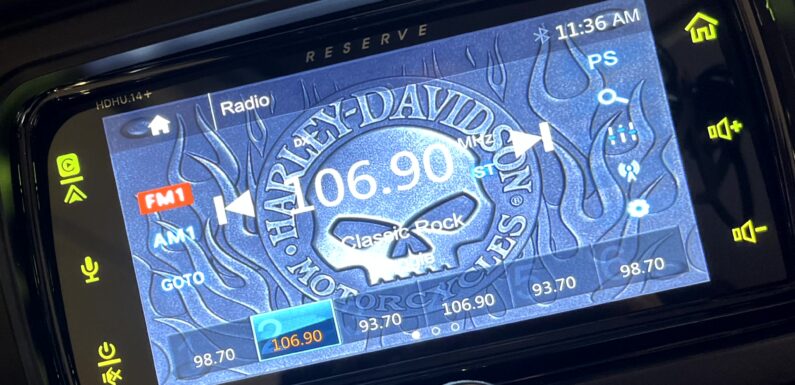
I replaced the stock radio on my 2014 Street Glide with a Sound Stream Reserve HDHU.14+ Plug and Play Head Unit. I have been looking at these for a bit, and I found it on sale at Garage Bagger Stereo. Ordered it on a Sunday and had it on Thursday. Friday I had the day off in observance of Veteran’s Day so I got it installed. The install was easy and only took about an hour.
The SoundStream HDHU.14+ units are pretty inexpensive everywhere right now, I guess something new and improved is probably on the way, or the SI model is what more people are buying. The SI model looks pretty cool, but I don’t really have a need for the digital gauges, but that’s just me – keep it simple. Really looking for a bit better sound and the ability to use Apple CarPlay. The HDHU.14+ is compatible with 2014 and up Harley Davidson Street Glides and several other models (RoadGlide, Ultra, Electra Glide).
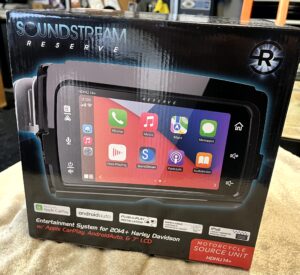
In the box I received from Garage Bagger Stereo:
- Soundstream Reserve Precision Power HDHU.14+ Head Unit
- SWC Interface for Handlebar Control Integration
- Plug-and-Play Wiring Harness
- Microphone (which I did not use)
- Replacement plastic bushings for mounting the radio
- Installation instructions
The installation instructions included in the package are decent and there are a bunch of great YouTube videos providing step by step instructions for installing the head unit to help as well.
The kit from Garage Baggers Stereo included the interface to provide (they say retain, but that is not exactly the case… more on that in a few) control from the stock handlebar controls.
All of the stock factory mounting hardware is used for installation. There is no mounting hardware in the kit except for a set of four replacement plastic isolation bushings which go in the head unit mounting holes. Don’t over look these bushings, they were in a small bag included in the box but were not mentioned in the installation instructions.
The new radio is nearly the exact same form factor as the stock radio and it fits in the stock location nicely. All the mounting holes lined up nicely and there are no gaps around the screen in the inner fairing.
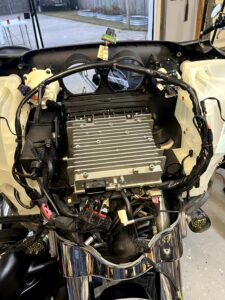
The cabling is pretty simple: attach the stock USB connector and stock the antenna connector, then attach the include wiring harness to the head unit, attach the SWC interface box, and then attach the factory radio connector to the wiring harness. Very plug-and-play.
After I cabled everything up, but before I tightened everything down, I tested the head unit. Turned on the ignition to make sure the unit powered on. Checked that the radio worked and used the stock USB port to connect my phone to test Apple CarPlay.
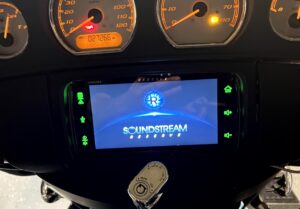
The radio worked great, and I preset a couple of the local stations. Apple CarPlay worked as expected: played some tunes, tested Apple Maps, made sure the handlebar controls worked. The 7″ LCD touch screen is gorgeous.
Everything worked as it should so I reinstalled the top support bracket, I tightened everything up, and reattached the cabling to the support bracket.
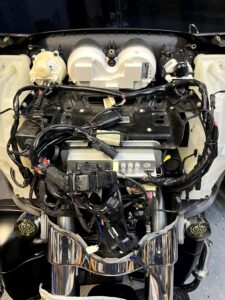
With everything tightened up I tested the radio again. All still good so I reinstalled the fairing.
Installation took around an hour from start to finish. The only tools required were a T27 torx and a 3/16 Allen wrench. A plastic trim pry tool is useful for getting the two factory wiring connectors off the support bracket, but a screwdriver would work just as well. Just be careful prying them out. Great little upgrade project that I think just about anyone should be able to tackle… low stress and easy peasy.
Now a little bit about the handle bar controls… you get basic controls… volume up and down, change through the pre-set radio stations, change tracks when listening to music on Apple CarPlay. Most other things will need to be done on the touch screen. You cannot cycle through screens on the radio using the handlebar controls like you can on the factory unit, for instance to scan for an FM radio station or to select another artist or album, at least not as far as I can tell. The info button, which on the factory unit displays some vehicle information, switches through the different inputs on the radio. Not at all a deal breaker, it is just a bit misleading to say it “retains” the factory controls.
A neat feature on the radio is the ability to customize the display background. Just add a 1024×600 jpeg image to a USB flash drive, connect it up, and in the display settings load it in as the custom background.
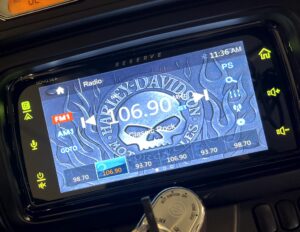
The color of the icons is customizable as well. You can set them to a single color or to rotate through the colors.
How does it sound? Well… GREAT! Way better than the stock radio, a lot louder as well. I haven’t played with all the features, like the digital equalizer and custom audio settings, but it does sound very nice right out of the box. Having access to apps on Apple CarPlay is pretty slick. Looking forward to trying it out on the road… will let you know how it goes.
Build. Tinker. Ride.
